How to Build an M4 Mac mini Cluster
A comprehensive guide to constructing a high-performance, on-premise cluster for containerized local AI workloads.
System Architecture
Our production architecture utilizes eight M4 and M4 Pro Mac minis serving requests in a hybrid on-premise and cloud framework. Active workloads are managed through AWS SQS queues. An autoscaler running in Kubernetes coordinates fallbacks, ensuring high availability with zero cloud idle cost.
Step 1: Hardware Selection and Network Topology
Designing a private compute cluster requires choosing the right hardware for the job rather than automatically purchasing the highest-tier systems. A highly successful methodology is to start by benchmarking the base M4 model, then selecting the most cost-effective configuration that fits your specific needs while leaving a comfortable margin of performance headroom. In many distributed server environments, scaling horizontally with multiple inexpensive machines is often far more cost-effective than deploying fewer, highly expensive systems.
Additionally, network architecture decisions depend heavily on identifying system bottlenecks. For high-throughput REST API hosting configurations, network input and output capacities are paramount, making 10GbE Ethernet critical. Conversely, for compute-bound systems, such as speech transcription or video processing pipelines, standard 1GbE connections are more than sufficient because the primary processing delay is CPU or GPU execution rather than network transit.
By matching your hardware scale and network capacity directly to these system bottlenecks, you establish a lean, highly efficient foundation that avoids over-provisioning. Balancing inexpensive nodes with the appropriate network capacity enables the cluster to scale seamlessly. Once your physical hardware configurations and networking infrastructure are finalized, the next crucial challenge is managing the physical layout and temperature profiles of multiple stacked units. Read on to discover how we architected our rack placement, analyzed real FLIR thermal camera profiles, and kept core temperatures low under continuous peak processing loads.
Physical Layout and Thermal Management
Proper thermodynamic planning is essential when grouping multiple high-performance systems in a dense on-premise space. The aluminum case of each M4 Mac mini serves as a giant physical heat sink, transferring heat away from the internal silicon and dissipating it through the top and sides of the metal chassis.
Although Apple's marketing photos typically depict the machines resting flat with their exhaust vents facing down, these compact enclosures do not incorporate a vapor chamber. Consequently, you can position the Mac minis flat or on their side. Both orientations are completely acceptable and thermally stable.
For our eight-node cluster, we arranged the Mac minis in a vertical stack layout using wooden risers. We added deliberate vertical separation gaps between each machine in the rack. This vertical layout provides ample physical spacing, allowing cooler ambient air to circulate freely between the aluminum casings and reducing heat transfer from adjacent nodes.
Furthermore, we strategically placed our heaviest workload nodes at the top of the stack. These include the M4 Pro systems running our voice transcription pipelines. By positioning them at the peak of the rack, we ensure they have direct contact with rising cooler ambient currents and do not absorb heat radiating from surrounding hardware.
The following images are false-color thermal captures that visually illustrate these heating patterns, heat sink performance, and structural airflow benefits across the active rack assembly.
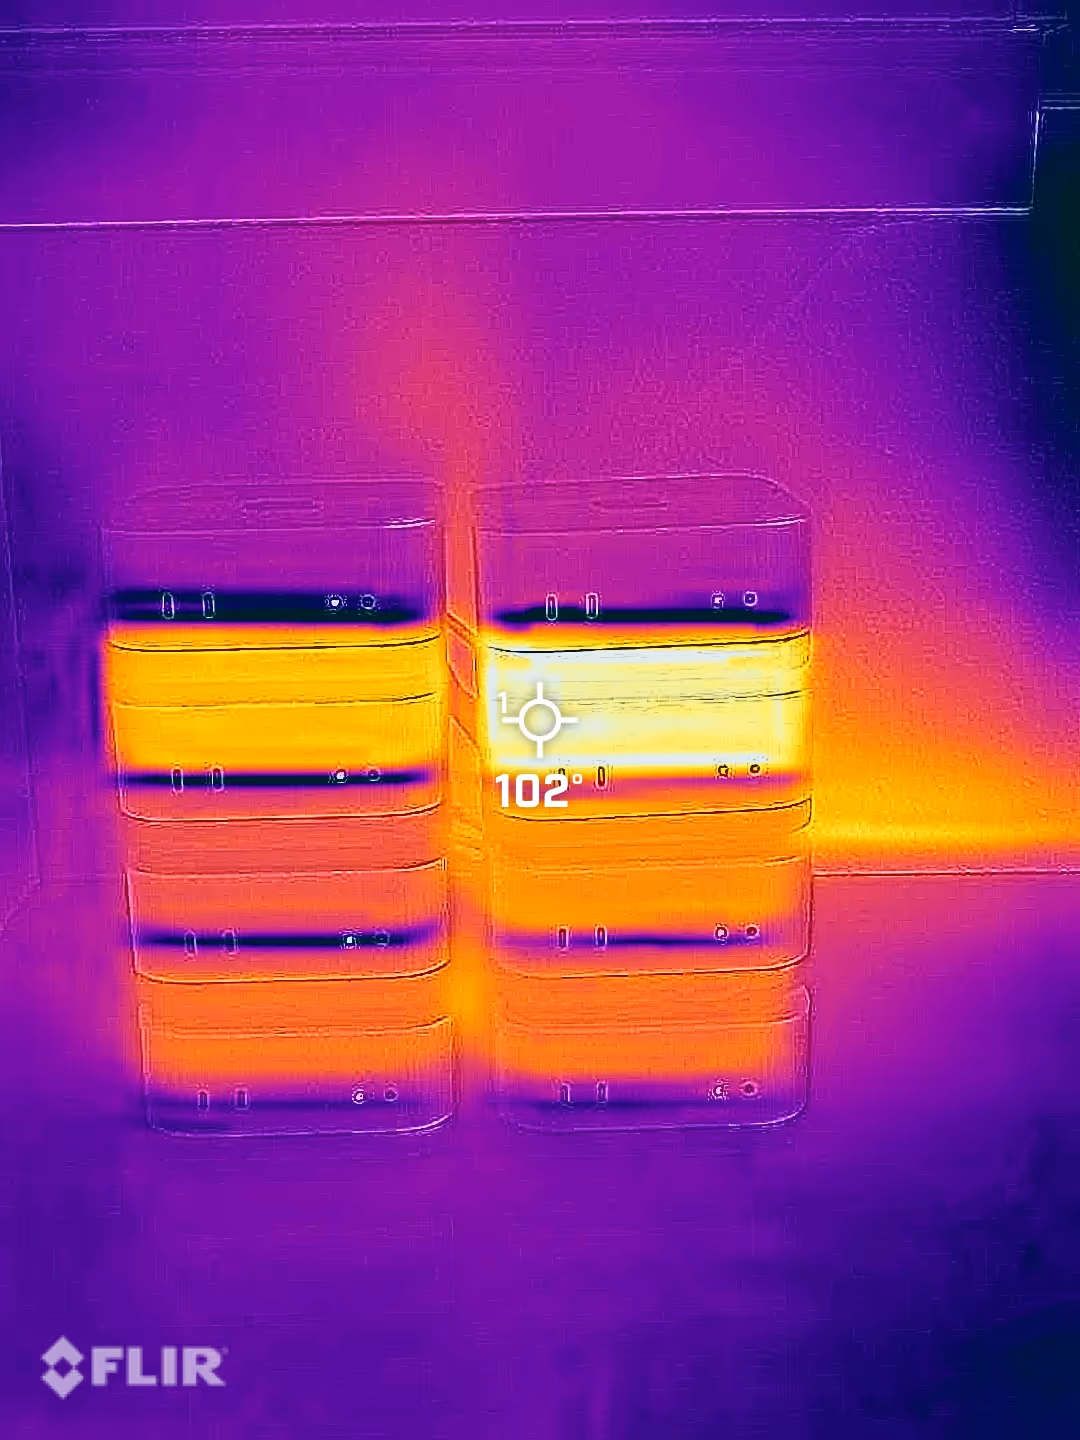
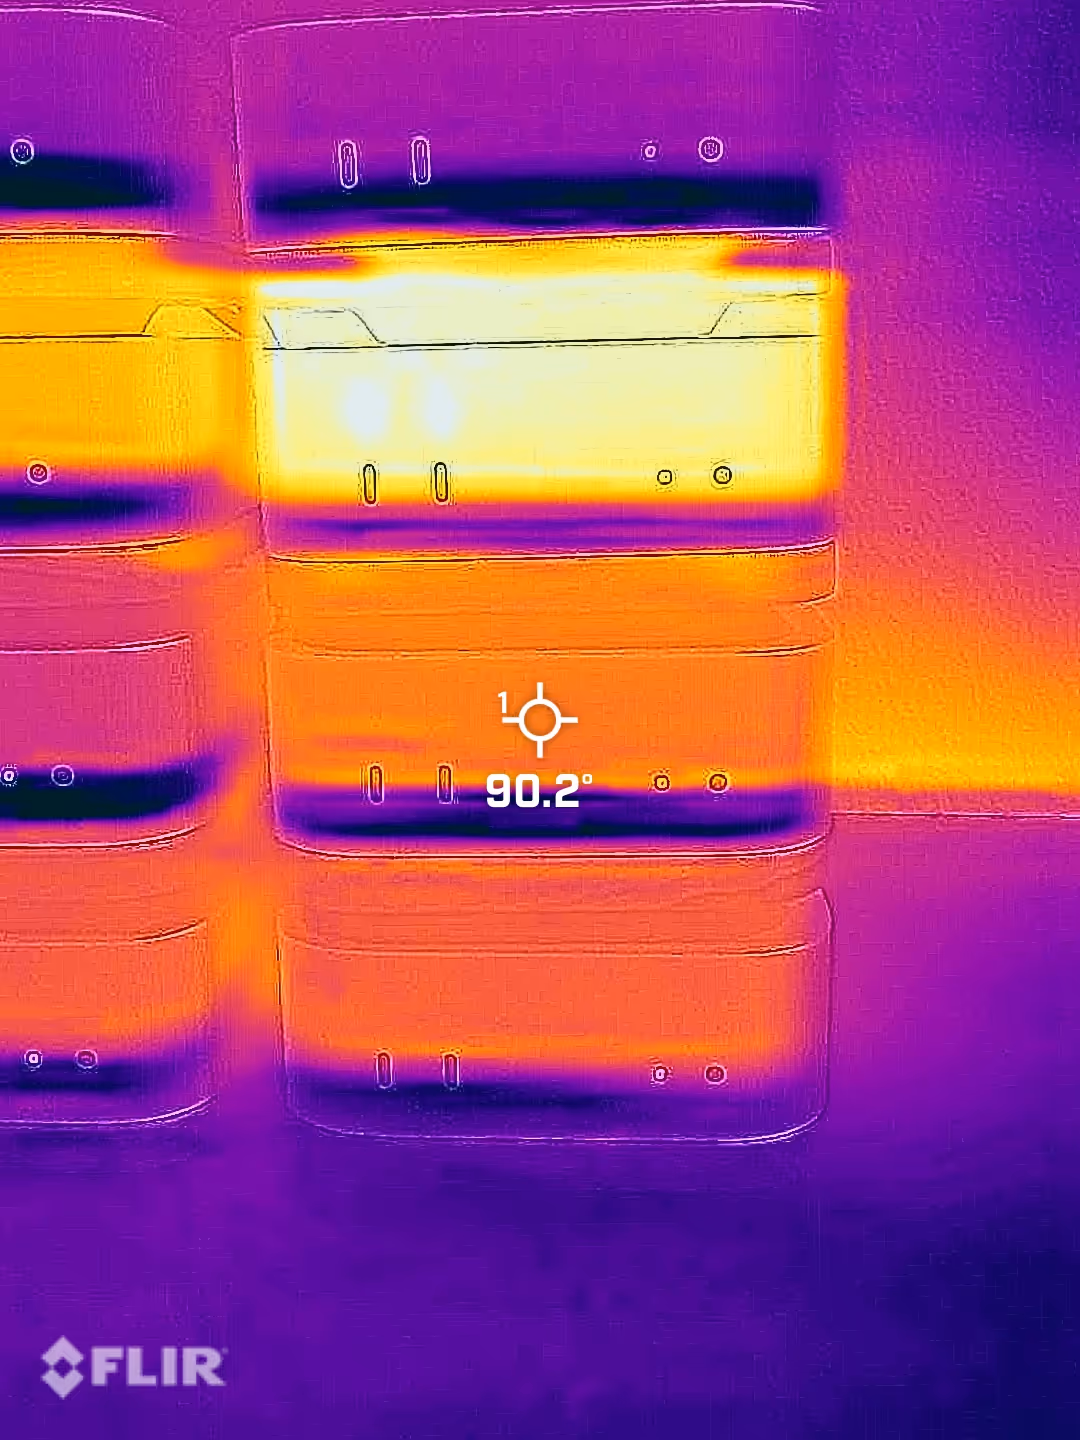
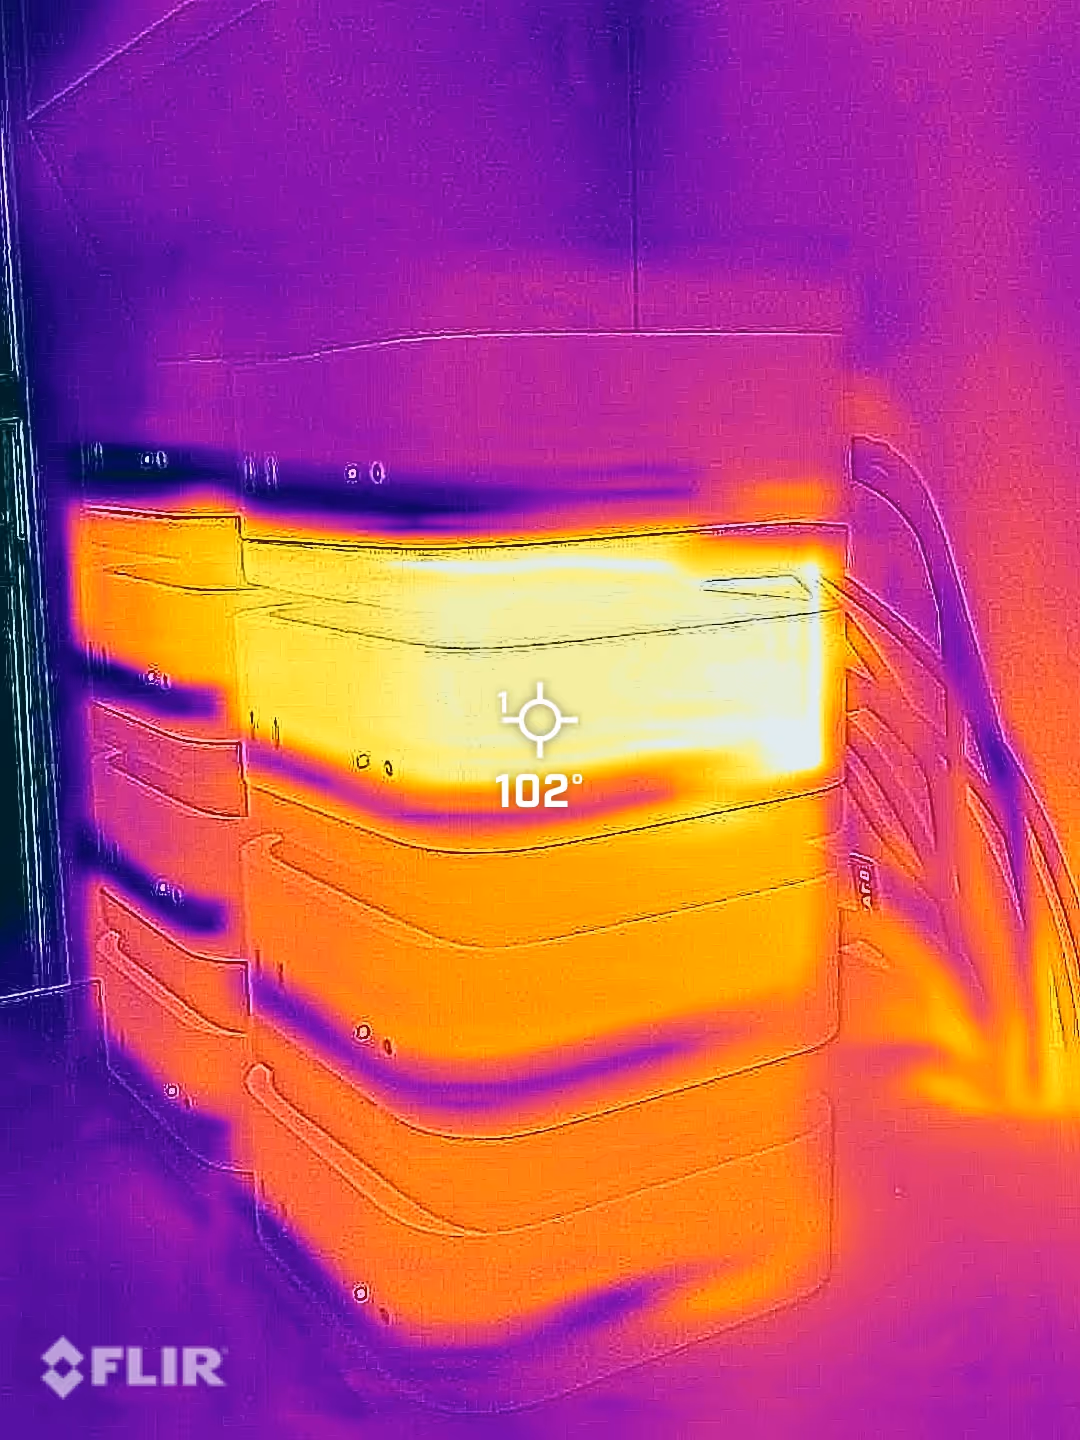
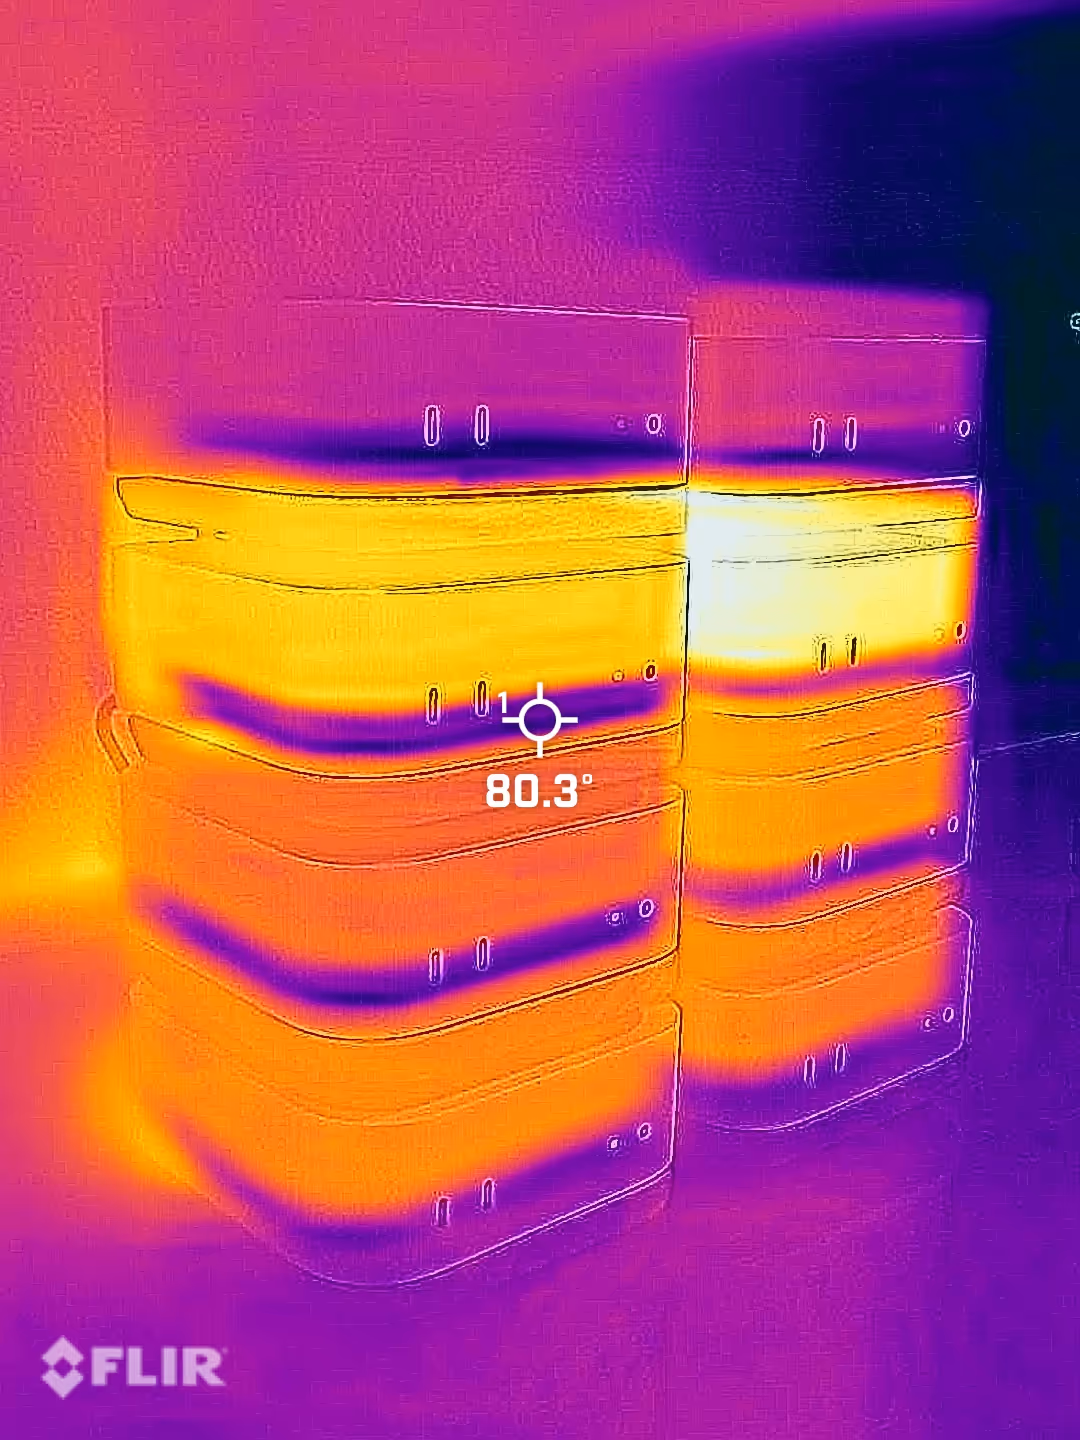
These diagnostic images were captured using a specialized FLIR ONE thermal camera. The camera is available for Android platforms and iOS devices, making it an excellent choice for initial hardware assembly and hot-spot inspection during physical setup.
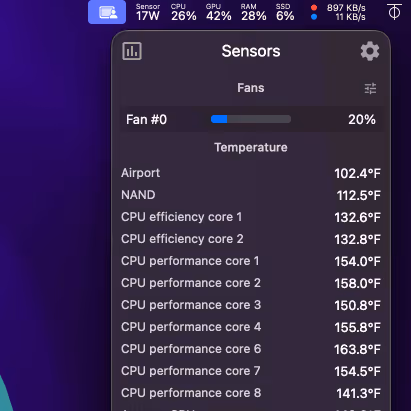
While physical thermal imaging is perfect for early validation, you will want to implement continuous software telemetry once your cluster is deployed in production. Utilizing dedicated utilities such as the open-source Mac Stats tool allows you to pull live thermal values directly from internal macOS sensors. For scaling setups, you can configure telemetry scripts to forward these temperature readings directly into central dashboards like Grafana or Amazon CloudWatch to monitor the thermal health of every node in real time.
Step 2: Base Operating System Configuration
To optimize performance and minimize idle background overhead, we run native macOS across our physical nodes. Running a full graphical user interface introduces an idle memory overhead of a few hundred megabytes, but the benefit of accessing the complete, uncompromised compute resources of the M4 silicon makes this minimal memory tax well worth paying. We begin by stripping out unnecessary consumer software, including the default Chess application, to minimize the overall attack surface. Furthermore, to maximize efficiency and eliminate background memory consumption, we disable Wi-Fi and Bluetooth entirely, routing all cluster communications through our high-speed wired Ethernet network.
To guarantee enterprise-grade security at the local hardware level, every node is configured with FileVault disk encryption enabled and the native macOS Firewall fully active.
Maintaining high availability and uninterrupted remote control requires adjusting several system preferences. We apply the following specific macOS configuration parameters to each node:
- Energy Mode: High Power is selected to ensure the CPU and GPU operate at peak potential.
- Prevent automatic sleeping when the display is off: Enabled to keep system threads constantly active.
- Put hard disks to sleep when possible: Disabled to prevent any drive spin-down latency.
- Wake for network access: Enabled to support remote wake signals.
- Start up automatically after power failure: Enabled to recover cluster operations automatically when utility power is restored.
- Turn off display when inactive: Set to Never to ensure background rendering and process loops are not interrupted.
- Log in automatically: Enabled to bypass interactive login prompts during system restarts.
- Open at Login: Configured with a custom Automator application that executes the required initialization command line scripts.
- Screen Sharing and Remote Login: Enabled to facilitate remote cluster administration and secure shell commands from a primary laptop.
- Display Simulation: Active HDMI dummy plugs are inserted into each node to simulate a physical monitor. Without these dummy plugs, the graphics subsystem can sleep, causing a black hanging screen when initiating Screen Sharing remote access sessions.
Once these core OS optimizations and security baselines are established, we capture a backup of the finalized clean system state using Time Machine. This base image enables our team to quickly restore or deploy new nodes to an identical, standardized starting point.
Step 3: Establishing Secure Remote Access
Managing an on-premise compute stack requires reliable remote administration capabilities. However, exposing default remote access protocols such as VNC, Screen Sharing, or secure shell access directly to the public internet is wildly insecure and leaves nodes vulnerable to automated brute-force attacks.
To safeguard the cluster, we configured a private Virtual Private Network topology rather than mapping ports publically. Private overlay network solutions allow for encrypted communication between devices without configuring complex router port forwarding or exposing local firewall ports.
Two popular and reliable tools for this tool are ZeroTier and Tailscale. Both services enable you to group physical cluster nodes and administration laptops into a single, secure virtual local area network. For our cluster, I personally use ZeroTier but have heard good feedback about Tailscale too.
Step 4: Determining the Right Process Management Solution
When orchestrating physical node clusters, it is common to deploy container orchestration platforms such as k3s. However, container runtimes and many Linux distributions do not natively support or expose core Apple silicon hardware features, including the unified memory GPU, Metal compilation, or the Apple Neural Engine. Because we host heavy AI workloads, we chose to bypass these container orchestration systems to prevent losing critical GPU and Neural Engine hardware acceleration.
Rather than managing containers, we monitor node processes directly using the lightweight process manager
pm2
and sync all system logs and telemetry to Grafana. The machines run all operational servers and processing pipelines
under a restricted, non-admin system user named web, establishing a hard boundary against
unauthorized lateral movement and keeping application environments jailed in compliance with strict boundary
defense guidelines.
Step 5: Designing Hybrid Cloud Fallbacks via AWS SQS
To prevent service interruption if physical power or external network connectivity drops, route all incoming workload request payloads into an AWS SQS queue. The local cluster nodes continuously pull from this queue to perform processing. Concurrently, configure a cloud-based autoscaler to monitor the queue depth.
If the queue length increases beyond five messages or the local cluster goes offline, temporary cloud instances automatically spin up to handle the load. Once the local physical cluster resumes operation or the load decreases, the cloud workers scale back to zero replicas. This hybrid model keeps cloud idle costs at zero under normal conditions.
On-Premise Tinkering versus Data Center Colocation
While deploying physical Mac minis in a remote collocated data center cabinet provides redundant power loops and high bandwidth pipes, starting with an on-premises setup is ideal for development. Having physical access lets me tinker iteratively, swap network components, and adjust racks easily. I have decided to move to a collocated data center once I have stopped tinkering for a few weeks on the unit.
Operating System Selection: Native macOS versus Bare-Metal Linux
A common point of discussion is whether to flash these physical nodes to run bare-metal Linux distributions. While headless Linux consumes slightly less idle operating system memory than macOS, native macOS remains the definitive choice for newer Apple silicon generations. Native Apple Neural Engine acceleration and Metal GPU compilation drivers are not fully supported or stable on Linux for newer M3 and M4 series hardware.
Attempting to run bare-metal Linux results in losing the unified memory GPU acceleration libraries that make Apple silicon exceptionally efficient for local large language model inference. Sticking with macOS ensures full AppleCare warranty compliance and seamless system updates.
Mitigating Non-ECC Memory Risks in Consumer Hardware
Enterprise server architects often point out that the Mac mini utilizes standard consumer memory instead of Error correcting code memory. In standard database or operating system servers, memory bit flips can cause silent data corruption or sudden crashes, which makes Error correcting code memory desirable.
For our cluster, we mitigate this risk through our architectural model. The Mac minis function as stateless, ephemeral workers pulling from a queue. If a physical node encounters a memory anomaly and crashes, the task is not lost. The message simply times out in the queue, and our cloud failover instance or another cluster node automatically picks it up for retry. This stateless architecture makes consumer-grade hardware perfectly safe and highly cost-effective for high-frequency AI inference tasks.
Power Footprint and Cost Efficiency
Another common critique of localized compute clusters is the high cost of electricity and air conditioning. Traditional server hardware requires dedicated high-amp circuits, custom server rooms, and massive cooling units that quickly offset any software licensing savings.
The M4 Apple silicon platform bypasses this entire infrastructure burden. Because each base M4 mini draws only four watts when idle and under thirty-two watts under peak GPU inference load, our entire eight-node cluster operates at under three hundred watts under peak load. This power draw is less than a standard consumer gaming desktop or a simple space heater. Consequently, standard office electrical outlets and routine in-window cooling are more than sufficient to maintain stable core temperatures of seventy-two degrees Celsius under heavy continuous loads.
To safeguard our cluster against sudden power drops or local outages, we integrate 510W CyberPower battery backups. We route three Mac mini systems per backup unit to maintain a comfortable power margin. Because each M4 Pro model exhibits a peak power draw of 140 watts, loading three active nodes per unit ensures a combined full-blast power draw of 420 watts, leaving ample headroom under the 510-watt maximum limit. When installing these backups, be careful to connect the systems exclusively to the battery-backed outlets, as the left side of these units only provides surge protection without battery fallback.
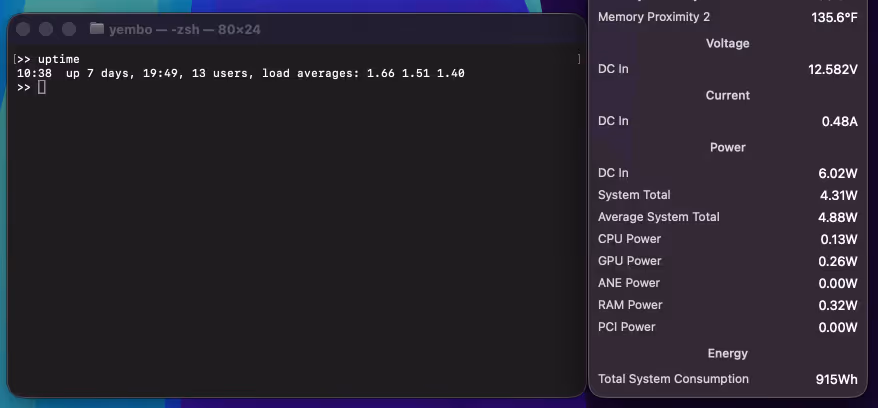
To prove how incredibly efficient these systems are in practice, we tracked the real production runtime consumption of one of our M4 Pro speech transcription nodes over a complete week. Because Apple silicon is highly optimized for deep sleep transitions and low-power processing, the transcription node consumed a total of only 915 watt-hours during a full seven days of continuous operation.
Extrapolating this weekly consumption over a full year of fifty-two weeks results in an annual energy requirement of only 47.58 kilowatt-hours per node. This makes physical local hosting remarkably inexpensive, even in regions with high residential energy rates.
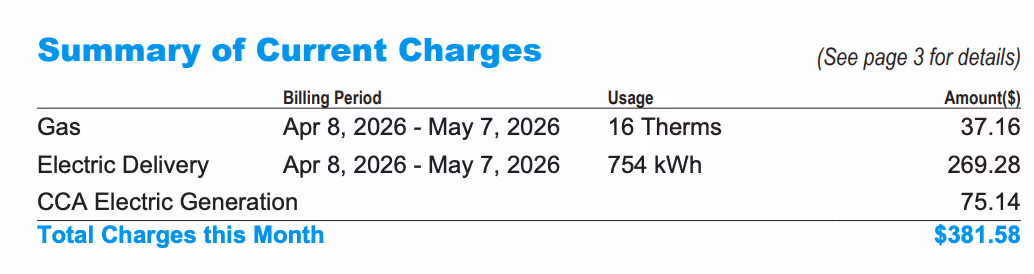
For example, our cluster operates in a region serviced by San Diego Gas and Electric, where residential utility rates are notoriously high. During a recent billing cycle, our residential electricity charges totaled $344.42 for 754 kilowatt-hours of usage, which translates to a high rate of approximately $0.46 per kilowatt-hour. We calculated this by subtracting the irrelevant $37.16 natural gas service charge from the total utility statement of $381.58.
Even when subjected to these high utility rates, the annual cost to power one of our production speech transcription nodes is only $21.89. This extremely low operational cost makes localized Apple silicon clusters exceptionally cost-effective compared to cloud serving models.
Join the Local AI Group
Scaling localized AI workloads in enterprise and hyper-growth environments requires solving highly complex infrastructure, secure networking, and hardware optimization challenges at scale.
The Local AI Group is the premier global technical network designed exclusively for active senior engineering leaders, including Chief Technology Officers, VPs of Engineering, and Directors of Engineering at Fortune 500 companies and top-tier startups. Our invitation-only space connects leaders scaling production-grade local AI systems. We bypass commercial marketing hype to focus strictly on hardware topologies, private LLM clusters, enterprise security frameworks, and custom sandboxing alongside elite peers operating at the absolute top of the global technology sector.
Roundtable Focus Areas
- Direct exchange on physical cluster topologies, high-throughput GPU clusters, and enterprise server architecture
- Vetted blueprints for thermodynamic profiles, process orchestration, and private model deployment pipelines
- Hardened boundary defense frameworks for satisfying SOC 2 and ISO 27001 perimeters with repatriated infrastructure
I vet each application myself to ensure a high-signal environment of peer practitioners.
Apply to Join the Slack GroupSharing confidential or proprietary information is strictly forbidden. Participation is subject to the Terms of Use.
Building an M4 Mac mini Cluster
This article is part of an in-depth technical series detailing the creation of a localized Apple silicon server cluster for enterprise AI inference.
How We Built an M4 Mac Cluster to Cut AI Cloud Spend by $35k/Year
The business case and localized architecture that cut enterprise Google Cloud spend by $35,000 annually.
How to Build an M4 Mac mini Cluster
Step-by-step setup guide covering hardware configuration, base macOS setup, secure remote access, process management, and cloud fallbacks.
Local AI Agent Hosting on M4 Mac mini
Configuring a secure, low-power private AI appliance for always-on autonomous agent workflows.
Local AI Security, ISO 27001:2022 & SOC 2 Compliance
Architecting a hardened physical perimeter to satisfy rigorous enterprise ISO 27001:2022 and SOC 2 audits.
Need Assistance Setting Up Your Cluster?
If you want a detailed hardware architecture guide, network configuration support, or deployment blueprints, let's connect.